How to add left padding in react js?
July 16, 2024Hi Friends 👋,
Welcome To aHoisting!
To add left padding in react js, you can use style={{ paddingLeft: '40px' }}. It will add left padding in react js.
Today, I am going to show you, how to add left padding in react js.
Table of contents
- Install and create a new React app.
- Import react component.
- Create a Component.
Let’s start with the first step.
Step 1: Install and create a new React app.
First you have to install the React project. You should use create-react-app command to create a new React project.
npx create-react-app my-app
cd my-app
npm start
Step 2: Import react component.
After installing, you have to import your React component. To do this, add the following line to the top of your component file.
import React from 'react';Step 3: Create a Component.
You can use style={{ paddingLeft: '40px' }} to add left padding in react js.
<div style={{ paddingLeft: '40px' }}>
  This div has left padding.
</div>
Add left padding example.
The below code is an example of a React. You have to import react and set style={{ paddingLeft: '40px' }} to add left padding in react js.
App.js
import React from 'react';

function App() {
  return (
    <div style={{ paddingLeft: '40px' }}>
      This div has left padding.
    </div>
  );
}

export default App;
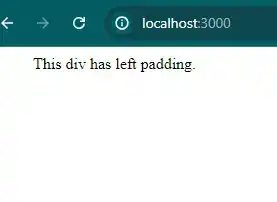
In the above code example, I have used the style={{ paddingLeft: '40px' }} to add left padding in react js.
Check the output of the above code.
All the best 👍
