How to create custom radio button in react js?
November 21, 2024Hi Friends 👋,
Welcome To aHoisting!
To create custom radio button in react js, you can use type="radio" in <input>with css. It will create custom radio button in react js.
Today, I am going to show you, how to create custom radio button in react js.
Table of contents
- Install and create a new React app.
- Import react component.
- Create a Component.
Let’s start with the first step.
Step 1: Install and create a new React app.
First you have to install the React project. You should use create-react-app command to create a new React project.
npx create-react-app my-app
cd my-app
npm start
Step 2: Import react component.
After installing, you have to import your React component.
import React, { useState } from "react";
import "./App.css"; // Import CSS styles
Step 3: Create a Component.
You can use type="radio" to create custom radio button in react js.
<div>
  <label>
    <input
      type="radio"
      name="custom-radio"
      value="option1"
      checked={selectedOption === 'option1'}
      onChange={handleChange}
    />
    <span className="radio-label">Option 1</span>
 </label>
    <label >
        <input
          type="radio"
          name="custom-radio"
          value="option2"
          checked={selectedOption === 'option2'}
          onChange={handleChange}
        />
        <span>Option 2</span>
      </label>

      {/* Display Selected Option */}
  <p>Selected Option: {selectedOption}</p>
</div>
Create custom radio button example.
The below code is an example of a React. You have to import "./App.css" and use type="radio" in <input> with css to create custom radio button in react js.
App.js
import React, { useState } from "react";
import "./App.css"; // Import CSS styles

const CustomRadio = () => {
  const [selected, setSelected] = useState("option1");

  const handleChange = (value) => {
    setSelected(value);
  };

  return (
    <div className="radio-group">
      <label className="custom-radio">
        <input
          type="radio"
          name="radio"
          value="option1"
          checked={selected === "option1"}
          onChange={() => handleChange("option1")}
        />
        <span className="radio-button"></span>
        Option 1
      </label>
      <label className="custom-radio">
        <input
          type="radio"
          name="radio"
          value="option2"
          checked={selected === "option2"}
          onChange={() => handleChange("option2")}
        />
        <span className="radio-button"></span>
        Option 2
      </label>
    </div>
  );
};

export default CustomRadio;
App.css
.radio-group {
    display: flex;
    gap: 20px;
  }

  .custom-radio {
    display: flex;
    align-items: center;
    cursor: pointer;
  }

  .custom-radio input[type="radio"] {
    display: none;
  }

  .radio-button {
    width: 20px;
    height: 20px;
    border: 2px solid #007bff;
    border-radius: 50%;
    margin-right: 10px;
    display: flex;
    align-items: center;
    justify-content: center;
    transition: background-color 0.3s ease, border-color 0.3s ease;
  }

  .radio-button::after {
    content: "";
    width: 10px;
    height: 10px;
    background-color: #007bff;
    transform: scale(0);
    transition: transform 0.3s ease;
  }

  input[type="radio"]:checked + .radio-button::after {
    transform: scale(1);
  }
In the above code example, I have used the type="radio" to create custom radio button in react js.
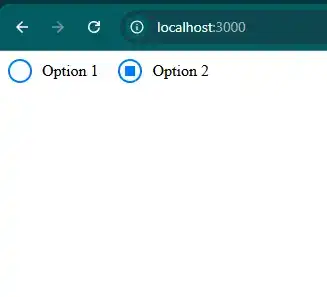
Check the output of the above code.
All the best 👍
